Request Your Free Quote!

A Corona Garage Becomes a Home Office Before the Rain
A Corona two-car garage becomes a finished home office in 14 days. See the drywall timeline, level-4 vs level-5 calls, and what the package costs.
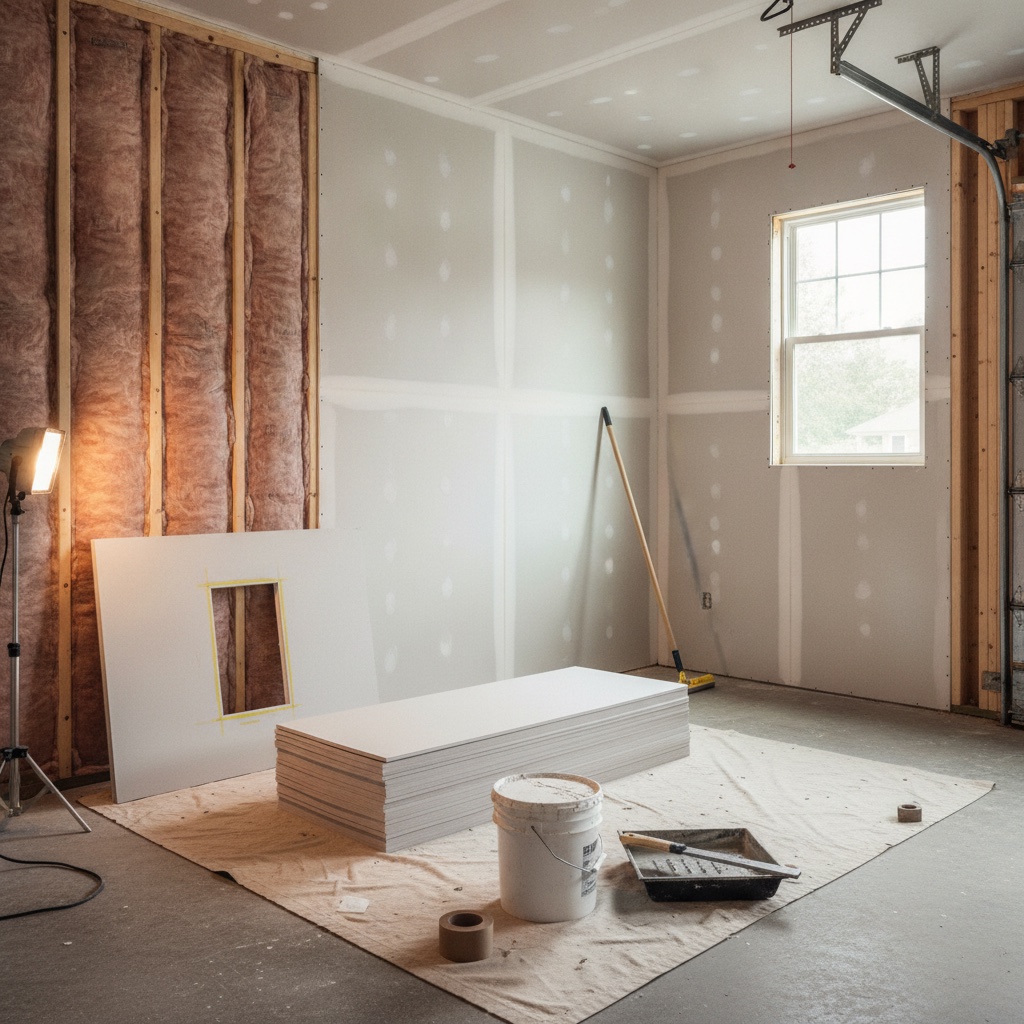
The garage in this Corona single-story had held two cars, a chest freezer, and fifteen years of boxes. By mid-October it held a stack of 5/8-inch drywall, a framed-in garage door opening, and a homeowner who wanted a working office before the first real storm of the season. That deadline mattered. Forecasters at UC San Diego’s Center for Western Weather and Water Extremes flagged another atmospheric river this week, with 1 to 2 inches of rain possible in coastal Southern California. A garage conversion still open to the weather in November is a garage conversion with wet insulation.
This is a composite of the kind of garage-to-room job JNL runs across the Inland Empire and Orange County: a roughly 420 square foot two-car garage turned into a finished room with a closet, a window where the door used to be, and walls that look like the rest of the house. Below is the full drywall timeline, the decisions that changed how the room turned out, and what the drywall package typically costs.
Day One: The Assessment That Set the Scope
The walk-through starts with what the garage already has. In this house the wall shared with the kitchen was already covered with 5/8-inch Type X board, the fire-rated separation code requires between a garage and living space. The other three walls were bare studs with stucco behind them. The ceiling had open joists and an attic hatch. A moisture meter on the slab edge and the bottom plates came back dry, which is the good news you want before closing anything up in a rainy month.
Three items went on the scope sheet that day. First, the garage door opening needed a framed infill wall with a window, insulated and sheathed before any board went up. Second, the existing Type X on the kitchen wall had dents, a hole from an old shelf bracket, and a decade of grease near the door, so it would be patched and skim coated rather than torn off. Third, the homeowner wanted the room to read as part of the house, which meant matching the light orange peel texture on the hallway walls.
Framing, Insulation, and Hanging the Board
The framer closed the garage door opening in two days, setting a 2×4 wall on a treated sill plate with a header sized for a 48 by 36 inch window. Once the electrician roughed in four outlets, a dedicated circuit for a mini-split, and two recessed cans, the city inspected framing and electrical. Then insulation went in: R-13 batts in the exterior walls and R-30 in the ceiling. That sequence matters. Drywall cannot go up until insulation passes, and in a rainy stretch the inspection calendar is often the slowest part of the job.
Hanging took one long day for a two-person crew. The room used about 46 sheets of board, roughly 1,470 square feet including waste. The ceiling got 5/8-inch board hung first, run perpendicular to the joists so the seams land on framing. Walls got 1/2-inch standard board, hung horizontally with 12-foot sheets to cut down on butt joints. Around the new window the crew wrapped the returns in board instead of adding wood trim, because the homeowner wanted the clean, trimless look the main house already had.
Taping, Mud, and the Level-4 Versus Level-5 Call
Taping and finishing ran four working days, with drying time between coats. Day one was paper tape bedded on flat seams and corner bead on the window returns. Days two and three were fill and finish coats with a 10-inch and a 12-inch knife. Day four was a light sand and an inspection under a work light held flat against the wall. Raking light shows every ridge and crater, and it is the same light the afternoon sun will throw through that new west-facing window.
The big decision came at the end of taping. A level-4 finish is the standard for most textured rooms: tape, three coats over joints and fasteners, sanded smooth. A level-5 finish adds a skim coat over the entire surface so the paper and the mud absorb paint evenly. Level-5 usually adds $1.25 to $2.00 per square foot of wall. Since this room was getting a light orange peel texture, level-4 was the right call on the walls. The texture hides minor variation and gives the paint a consistent surface.
The old Type X wall was the exception. Its patches and grease-stained paper would have flashed through the texture as dull spots. The crew cleaned it with a degreaser, sealed it with a shellac-based primer, and skim coated the entire wall before texture. That one wall got level-5 treatment inside a level-4 room. It cost about half a day of labor, and it is the reason nobody can tell where the original garage wall ends and the new work begins.
Texture, Primer, Paint, and the Final Walk
Matching an existing orange peel is half equipment and half patience. The crew sprayed a sample board first, adjusted the hopper pressure and the mud thickness, and held it next to the hallway wall in daylight before touching the room. Orange peel that is too heavy looks like a different house. Too light and it reads as a mistake. Once the sample matched, the full room took about two hours to spray. The ceiling stayed smooth and flat, which keeps a low garage ceiling from feeling even lower.
Primer went on the next morning, a PVA drywall primer on the new board and a second coat over the skimmed wall. Two finish coats followed: eggshell on the walls in a warm white the homeowner pulled from the living room, flat ceiling white overhead. The final walk happened on day fourteen, counted from the start of framing. The punch list was short: one nail pop near the closet, one corner bead touch-up, and a scuff on the window return from the installer’s ladder.
The finished room has one detail that only shows up in winter. Because the infill wall was insulated, wrapped, and closed before the November storms, the new window wall stays dry and the room holds heat without the mini-split running all evening. NBC Los Angeles described this month’s pattern as a “storm train,” with system after system rolling through the region. That is exactly the weather a half-finished garage conversion does not want to meet.
What a Garage Conversion Drywall Package Costs
For a 400 to 450 square foot two-car garage in Riverside or Orange County, the drywall portion of a conversion usually lands between $7,500 and $12,000. That range covers hanging, taping to level-4, texture matching, and a prime coat on new board. Skim coating an existing wall, wrapping window returns in board, and adding sound insulation between the room and the kitchen each push the number up. Paint is often a separate line item. A full conversion with electrical, a mini-split, a window, and a bathroom runs far higher, often $100,000 or more once plumbing is involved.
The schedule matters as much as the price. In this job, drywall and finish took about nine working days of the fourteen-day stretch. The rest was framing, inspections, and drying time. If the garage is already framed and insulated when the drywall crew shows up, those nine days can shrink to six or seven. Rainy weeks add a day or two because mud dries slower in damp air, and good crews run a dehumidifier rather than rushing the next coat.
If there is a garage at your place that keeps turning into a storage unit, it might be the most affordable new room you will ever add. JNL Drywall offers a free in-home assessment: we will walk the space, check the slab and the shared wall, and give you a written drywall scope with a timeline that works around the rain. Book a visit and see what that garage could be by spring.
Morning-context sources used: CW3E AR Outlook, 16 November 2026; NBC Los Angeles, “Storm train” forecast, 12 November 2026; ADU West Coast, Garage Conversion ADU in Southern California 2026.